How to Safely Change a Car Tyre

Most motorists will have encountered a puncture or a blowout at some point, but many will not be equipped with the skills to change the damaged tyre themselves. This can result in a frustrating and lengthy wait at the side of the road whilst you wait for the roadside assistance team to arrive. Did you know that to change a tyre, you generally only need four things: a spare tyre, a lug wrench, a jack and some wheel chocks? To ensure that you have the right equipment required for your vehicle, please check the vehicle owner’s manual.
Now that you know what tools you need to keep handy, we will guide you through the process of changing a tyre yourself in 10 simple steps:
- Assess if it is safe for you to perform the tyre change. Are you parked in a safe place away from passing traffic? Is the ground you are parked on firm enough to support the jack? – If the answer to either of these questions is no, and it is not possible to move your vehicle to a more appropriate place, please move away from your vehicle to a safe space, contact your roadside assistance team and follow their instructions.
- Get prepared for the tyre change by putting your car into first gear and applying the handbrake (if it has a manual transmission) or putting it into ‘park’ mode (if it has an automatic transmission). Ensure that all passengers have safely left the vehicle and get the tyre-change equipment ready.
- Put the wheel chocks in place on all wheels except for the one you will be changing.
- Loosen (but do not completely remove) the wheel nuts using the lug wrench. It is safest to do this before jacking up the vehicle.
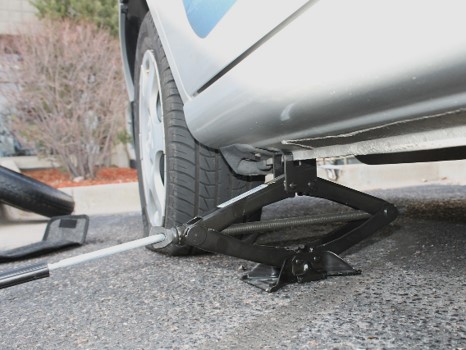
- Jack up the vehicle using the car’s dedicated jacking points and raise the car between 10 and 15cm from the ground – if you are unsure where these points are located, please consult the vehicle’s handbook for guidance.
- Finish removing the wheel nuts and proceed to remove the tyre by gently pulling it toward you. Once removed, place the tyre flat on the ground in a safe place.
- Place the replacement wheel onto the hub bolts or in line with the wheel nut slots. Once the wheel is in place, replace the wheel nuts and tighten them using the lug wrench.
- Lower the car, remove the jack and recheck the tightness of the wheel nuts using the lug wrench.
- If you have a tyre pressure gauge to hand, check the pressure of the new tyre to ensure that it is fully inflated – if you don’t, please drive carefully to a nearby petrol station to check them there. Inflate the tyre further if necessary.
- Take your damaged tyre in for professional inspection to determine whether it can be repaired or if it needs replacing – this needs to be done at your earliest convenience, particularly if you are now driving on a space-saver spare wheel (this will be smaller than your other wheels).
Back

